Pages
Ian Sands has taken a new position at South Brunswick HS Check out it out! http://ArtofSouthB.com
Showing posts with label sculpture. Show all posts
Wednesday, February 5, 2014
Artist Bryant Holsenbeck to Visit Apex
Environmental artist, Bryant Holsenbeck, will be the artist in residency next week here at Apex High School. Ms. Holsenbeck makes large-scale installations that document the waste stream of our society.
She has shown her work and taught throughout the United States. She has been the recipient of 2 North Carolina Arts Council Fellowships, a Project Grant and an NEA Arts and Learning Grant that she worked on in collaboration with the Chapel Hill Public Arts Commission.
Ms. Holsenbeck will be working with the Art History, AP Art and Sculpture classes.
Tuesday, December 17, 2013
Student Spotlight: Kristin
Class: Sculpture with Ms. Sudkamp
Blog: http://apex-2014-kristin.blogspot.com/
Low relief, or bas-relief, is when forms are slightly raised from the background. High relief is when the forms are raised at a far enough distance from the background that they look disconnected from the surface. Sunken relief is the opposite of low and high relief; instead of the forms being raised off the background, they are cut deeply into the surface.
For my Relief project, I chose to do an altered book because I wanted to try something different and it seemed like an interesting idea. My piece is a sunken type of relief, since I cut into the book to create a 3D scene. First, I had to choose a book that was the size and thickness I wanted. I drew the design I wanted to make and planned it out as a 3-dimensional picture: which parts were going to be which layer and how thick each of those layers were going to be. I numbered each layer from foreground to background, starting at 1 (the bird) and ending at 5 (the sky). This was also the order in which I would cut them. Then came the long process of cutting the pages. Basically, I would take five pages at the top of the layer, place a cutting board under them, cut the design out until I had cut through the five pages, then repeat until each layer was finished. This part took me at least two weeks to finish. After I had finished cutting the book, I painted the layers in bright colors and painted the rest of the book black. For the front cover and third page, I created stencils that I cut out and traced onto the book, then filled in with silver Sharpie. I also used the silver Sharpie for the lyrics on the first and second pages. For the back cover, I copied the logo for the Coldplay song "Up With The Birds", which was my inspiration for this piece. I used gold Sharpie for the bird and a blue-green acrylic paint that I bought for the circle surrounding it.
I am most proud of two things: that this piece turned out as amazingly as it did, and that I actually finished this at all (at least before the semester ended). The book turned out exactly as I pictured and hoped it would, and there is nothing at all I would change about it.
Class: Sculpture with Ms. Sudkamp
Blog: http://apex-2014-kristin.blogspot.com/
![]() |
| Front Cover |
For my Relief project, I chose to do an altered book because I wanted to try something different and it seemed like an interesting idea. My piece is a sunken type of relief, since I cut into the book to create a 3D scene. First, I had to choose a book that was the size and thickness I wanted. I drew the design I wanted to make and planned it out as a 3-dimensional picture: which parts were going to be which layer and how thick each of those layers were going to be. I numbered each layer from foreground to background, starting at 1 (the bird) and ending at 5 (the sky). This was also the order in which I would cut them. Then came the long process of cutting the pages. Basically, I would take five pages at the top of the layer, place a cutting board under them, cut the design out until I had cut through the five pages, then repeat until each layer was finished. This part took me at least two weeks to finish. After I had finished cutting the book, I painted the layers in bright colors and painted the rest of the book black. For the front cover and third page, I created stencils that I cut out and traced onto the book, then filled in with silver Sharpie. I also used the silver Sharpie for the lyrics on the first and second pages. For the back cover, I copied the logo for the Coldplay song "Up With The Birds", which was my inspiration for this piece. I used gold Sharpie for the bird and a blue-green acrylic paint that I bought for the circle surrounding it.
I am most proud of two things: that this piece turned out as amazingly as it did, and that I actually finished this at all (at least before the semester ended). The book turned out exactly as I pictured and hoped it would, and there is nothing at all I would change about it.
| MX stands for the title of the album that this song comes from, "Mylo Xyloto." "Up With The Birds" is track number 14. Hence, MX14. |
| Inner Pages |
![]() |
| Cut portion of book |
![]() |
| Detail |
![]() |
| Back Cover |
Thursday, December 12, 2013
Student Spotlight: Hannah - Sculpture
Spotlight: Hannah
Class: Sculpture with Ms. Sudkamp
Blog: http://apex-2015-hannahallen.blogspot.com/
The Three Types of Relief:There are three different types of relief. These include low, high, and sunken relief. Low relief is when material is added to the surface, but with very little height, such as a coin. High relief is when material is added to the surface, with a lot of height, so that the piece looks 3-D from the front. An example of this are ancient wall designs and sculptures. Sunken relief is when material is carved out or removed from the surface. My piece is considered sunken relief.
Medium & Method of Finishing:For this project, I chose to use clay as the medium. I chose clay, because I was mimicking the design on my bedspread, and I knew that It would turn out the most accurate, and precise if I used such a pliable material, such as clay. First, I drew a full size drawing of my piece on a large piece of paper, that I then cut out into the four tiles. Next, I started using the clay, so, I rolled out four slabs and cut them into squares. Then, I laid the corresponding paper drawing over the tile, and traced on the lines, so that I had an idea of where the lines and flowers would be once I started cutting into the clay. Next, I using multiple tools to carve out parts of the clay surface, which created the different shapes and designs. It was then fired. One bisque-ware, I glazed it with different colors, that would match the colors on my bedspread. Lastly, it was fired a final time.
Thoughts on the Final Product:For the most part, I am pretty proud of my piece. I am especially proud of the texture, size, and overall design of my piece. However, there are a couple of things I would change about it. For example, I would use brighter colors that were closer to the ones on my bedspread. I would also make it a little bit thinker, so it would be less fragile and prone to breaking.

My Pinterest: http://www.pinterest.com/hcallen2053/sudkamp-ceramics/
What is Land Art?Land Art is "The art of altering the natural environment to create earthworks." In other words, it is when you take things from the environment to create a piece of work that will eventually disappear.
Why did you choose this piece?I choose to make a mouse made of leaves, because when I was pinning and finding inspiration on Pinterest, I though the little animals that people made out of leaves were adorable! I also thought it would be relatively simple, but could be executed in many different ways.
What is one thing you might do differently next time?I would probably make more animals, so that the mouse would have little friends! I would probably also give myself more time, so that I could make them a little more detailed.
Sunday, December 8, 2013
Student Spotlight: Emma - Sculpture & Art Two
Relief Piece:
Three forms of relief artwork are high relief, low relief, and sunken
relief. High relief is when forms from the background come forwards to
almost half their depth. Low relief is when forms from the background
only come forward a little bit. Sunken relief is when you carve into the
medium instead of adding to it, so therefore creating the sunken in
effect.
I chose to use clay as my medium just because I really love working with clay and I thought it would achieve the final product i wanted the best. After my clay piece came out of the kiln I wasn't sure whether I wanted to use glaxe or paint but since I used paint on my vessel project I decided to just switch it up. I think the thing I'm most proud of is the center and the texture it has there. One thing I would change is to make sure and be absoultely positive I have it centered and even.
Nature Art:
Nature art, means exactly what its called, a form of art using things
you find out in nature. You create something out of what you kind find
in the environment you are and then just leave it and let it go, it's
temporary. I got the idea for my project because i kind of wanted to
created a flower or "plant," using other flowers and plants.
The first picture (above) is everything I just found in my backyard, and the one below is after I added some white paint just to add some detail. I wish I would've realized before I plucked the flower that I could've found one laying around that was already disconnected so I didnt have to kill it, so next time that thought will definitely be in the back of my mind.
Up Close And Personal:
When given the theme, "Up Close And Personal," I had multiple ideas that
I thought would be really cool. I was thinking maybe a drawing of my
ipod with my favorite bands or a pair of eyes, one with makeup and one
without. But everytime I tried to follow through with these ideas I
didn't like the way it looked, so I resorted to doodling in my
sketchbook one period and was messing around with the pastels and a
tortillon to blend stuff out. And a bunch of people told me it looked
really cool and Mr. Sands helped come up with the idea to do feathers.
To be honest, I haven't ever really payed attention to feathers but
after thinking about them, I realized that they demonstrate up close and
personal really well. Every feather off every single animal is
different. Not one feather is the same so it makes it personal. I chose
to use pastels because they blend really well but also can stand out
really well against blank paper. I think the only risk I took was just
kind of winging it and hoping my piece turned out okay. I used alot of
technique in this because I thought out side of the box when using the
tortillon to make the cool feather like design.
The "Student Spotlight" posts are excerpts taken from our student blogs.
You can see more of Emma's work here!
You can see all our student blogs here!
Saturday, November 23, 2013
Student Spotlight: Ashley T. - Art Three & Sculpture
Pressure Project.
The first thing that came to my mind when I thought
pressure was Ballet. I thought this because Ballet is a lot of pressure
on your foot, as well as a lot of pressure to be perfect. I didn't want
to use clay again, so instead I used a different process. This process
was taking wire and bending it into the shape I wanted it to be in in
order to look like a Ballet shoe. I then took newspapers and balled it
into certian sizes in certian areas in order for it to look like this.
To get the newspaper to stay I wraped it well with tape. Afterwards, I
painted it white for a cleaner and better look. After that, I found this
color ribbon that was similar to what a Ballet shoe color would look
like, it also has the texture of one too! I wraped this around the shoe
as well. I took a block of wood and painted it grey so that I could then
glue the shoe to it. I don't think I would change anything about this
project, I really like how it turned out.
Layers project:
I knew for a fact that I wanted to include text into my
project. Out of many quotes I came to this one. I liked this quote best
because I was able to make a cool tye dye background that related to my
quote, plus I really enjoy tye dye. To include layers into this project,
instead of cutting out one letter I had to cut out two and layer them
on top of each other. It was double the work but in the end it was worth
it. To make the letters stand out more I spray painted them white. To
get the tye dye background I took a pillow case and cut it open to make
it wider in order for the quote to fit. And finally, I hot glued the
letters onto the pillow case. I'd say this turned out really well,
there's nothing I would change about it!
Nature Art Project:
I really enjoyed making this because it was fun yet
simple to do. There are so many things you could create with nature and
so many ideas as well. While brainstorming I thought of the idea to make
a clock out of flowers, leaves, and twigs. I was at my house while I
made this and I found flowers from my front yard and leaves and twigs
from a random tree. I arranged them how I liked them best and kept it
like this. The twigs were obviously originally brown and I thought it
looked odd with the color of the flowers, so I painted the twigs pink.
Also, to make it more obvious that it was a clock, I wrote numbers on
the leaves with a sharpie. I really loved how it turned out. I love the
colors and how bright it looks compared to the sidewalk, it really pops
out at you. There is nothing I would change about it!
The "Student Spotlight" posts are excerpts taken from our student blogs.
You can see more of Ashley T's work here!
You can see all our student blogs here!
Sunday, November 10, 2013
Earth Works : Art One & Sculpture
Before it gets too cold Ms. Sudkamp's Art 1 & Sculpture classes completed a Land Art project.
We first checked out an amazing video by Tony Plant. This helped the students understand why art is created as well as introducing the idea of it being temporary. My Art 1 classes worked together as a table to create their pieces whereas the sculpture class worked individually. It was nice to see how their approaches to the project were so different.
Land Art Lesson
Thursday, November 7, 2013
Student Spotlight: Logan - Sculpture

Student Spotlight: Logan
Ms. Sudkamp's Sculpture Class
Logan's Blog

More of student's work: Logan's Blog
Monday, September 9, 2013
Pinterest In the Classroom
I (Ms. Sudkamp) have had a Pinterest addiction for quite some time. It is a GREAT resource for inspiration, finding artist, and my favorite: tutorials. This week the Sculpture/Ceramics class completed their own boards for their next project.
Friday, June 7, 2013
New ideas but for now... Summer!
Back in March, Mr Sands had the opportunity to meet with many outstanding art educators at 2013 NAEA National Convention in Fort Worth. The exchange of ideas was fantastic and it really got us thinking ahead for the 2013-14 school year.
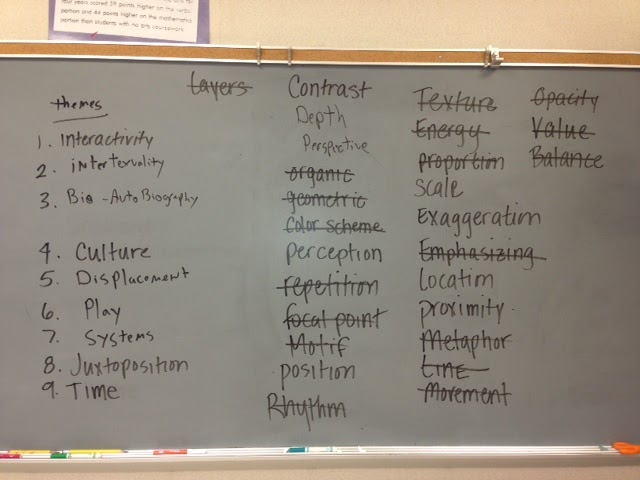
From those talks, our crack team of educators here at Apex HS developed a new set of goals. We will spend the summer devising a new approach to teaching and learning art. In fact, you can tell we already started. Just look at the board!
So go to the pool, sit back in your lounge chair and soak up the sun. Be well rested. You're gonna need it!
Till then... Have a Great Summer!!
Subscribe to:
Posts (Atom)


.jpg)